9. Doc2.0 MCP Server
9.1. Introduction
A step-by-step guide to connecting the Doc2.0 stateless Streamable HTTP MCP server to Claude Desktop, Claude Code and other AI agents, authenticated with a restricted access token.
Key Concepts |
|
|---|---|
Production endpoint |
|
Authorization |
|
Transport |
|
Token rights |
|
Note
The server is read-only. A MCP Read Only token cannot mutate platform
state — every exposed tool is annotated readOnlyHint: true.
MCP server URLs
Pick the endpoint that matches your environment. The configuration examples throughout this guide use the production URL — replace it with the sandbox URL when needed.
Environment |
MCP endpoint |
Purpose |
|---|---|---|
Production |
|
Live payment traffic |
Sandbox |
|
Safe testing and integration |
Warning
The restricted access token is issued per environment. Create the token in the profile of the same environment you intend to connect to. A token from one environment will not work on another.
Get a restricted access token
Access to the MCP server uses a Bearer token. Doc2.0 uses a restricted access
token — it grants rights only to a selected set of operations. The
MCP Read Only profile is enough to connect MCP.
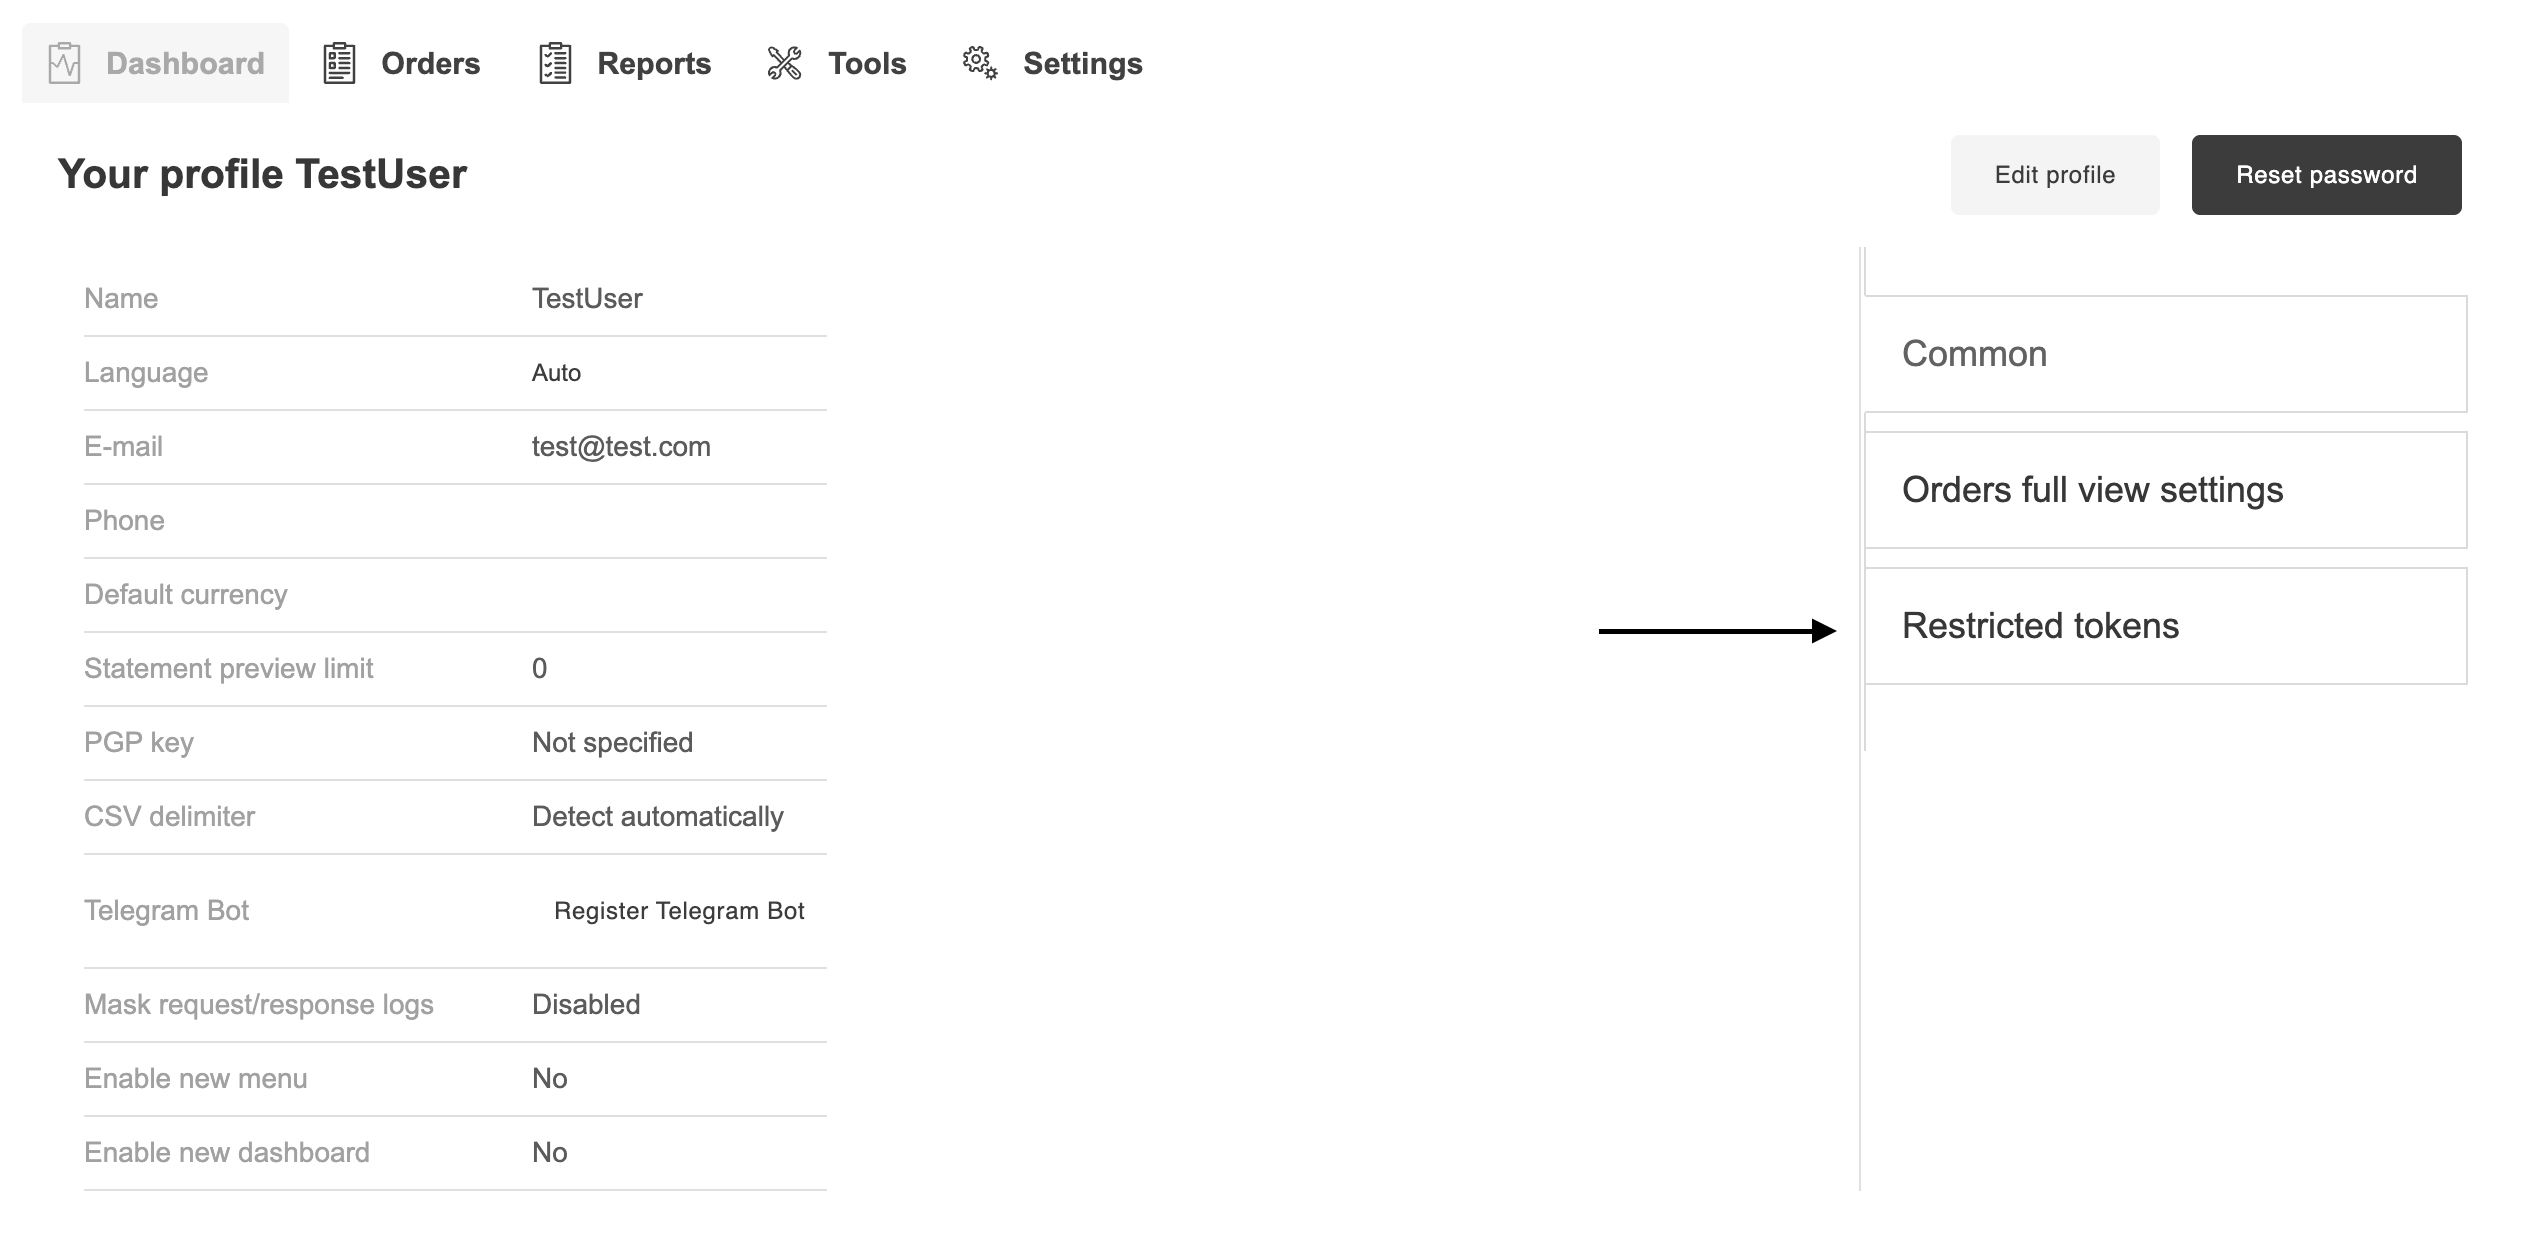
Step 1 — Open user profile
Go to the Restricted tokens section: Profile → Restricted tokens.
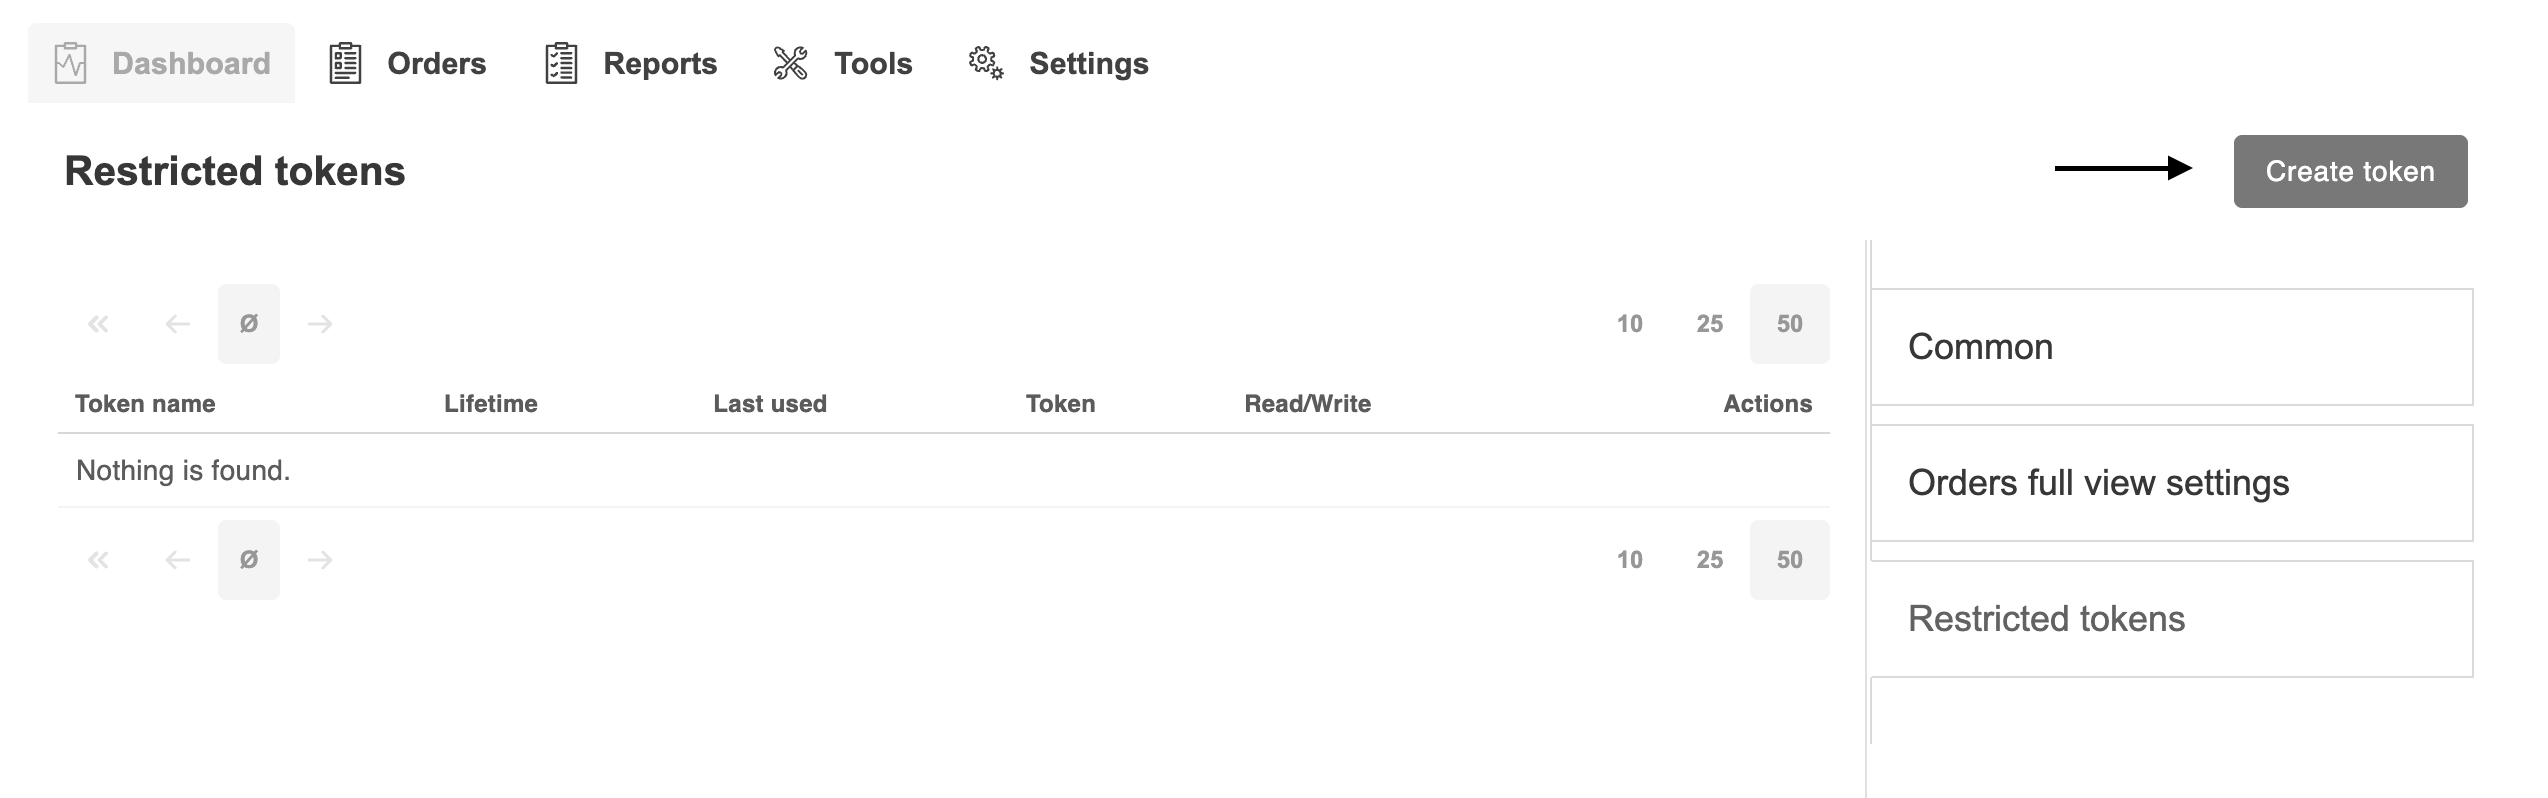
Step 2 — Click “Create token”
To create token, press the Create token button in the top-right corner of the Restricted tokens page.
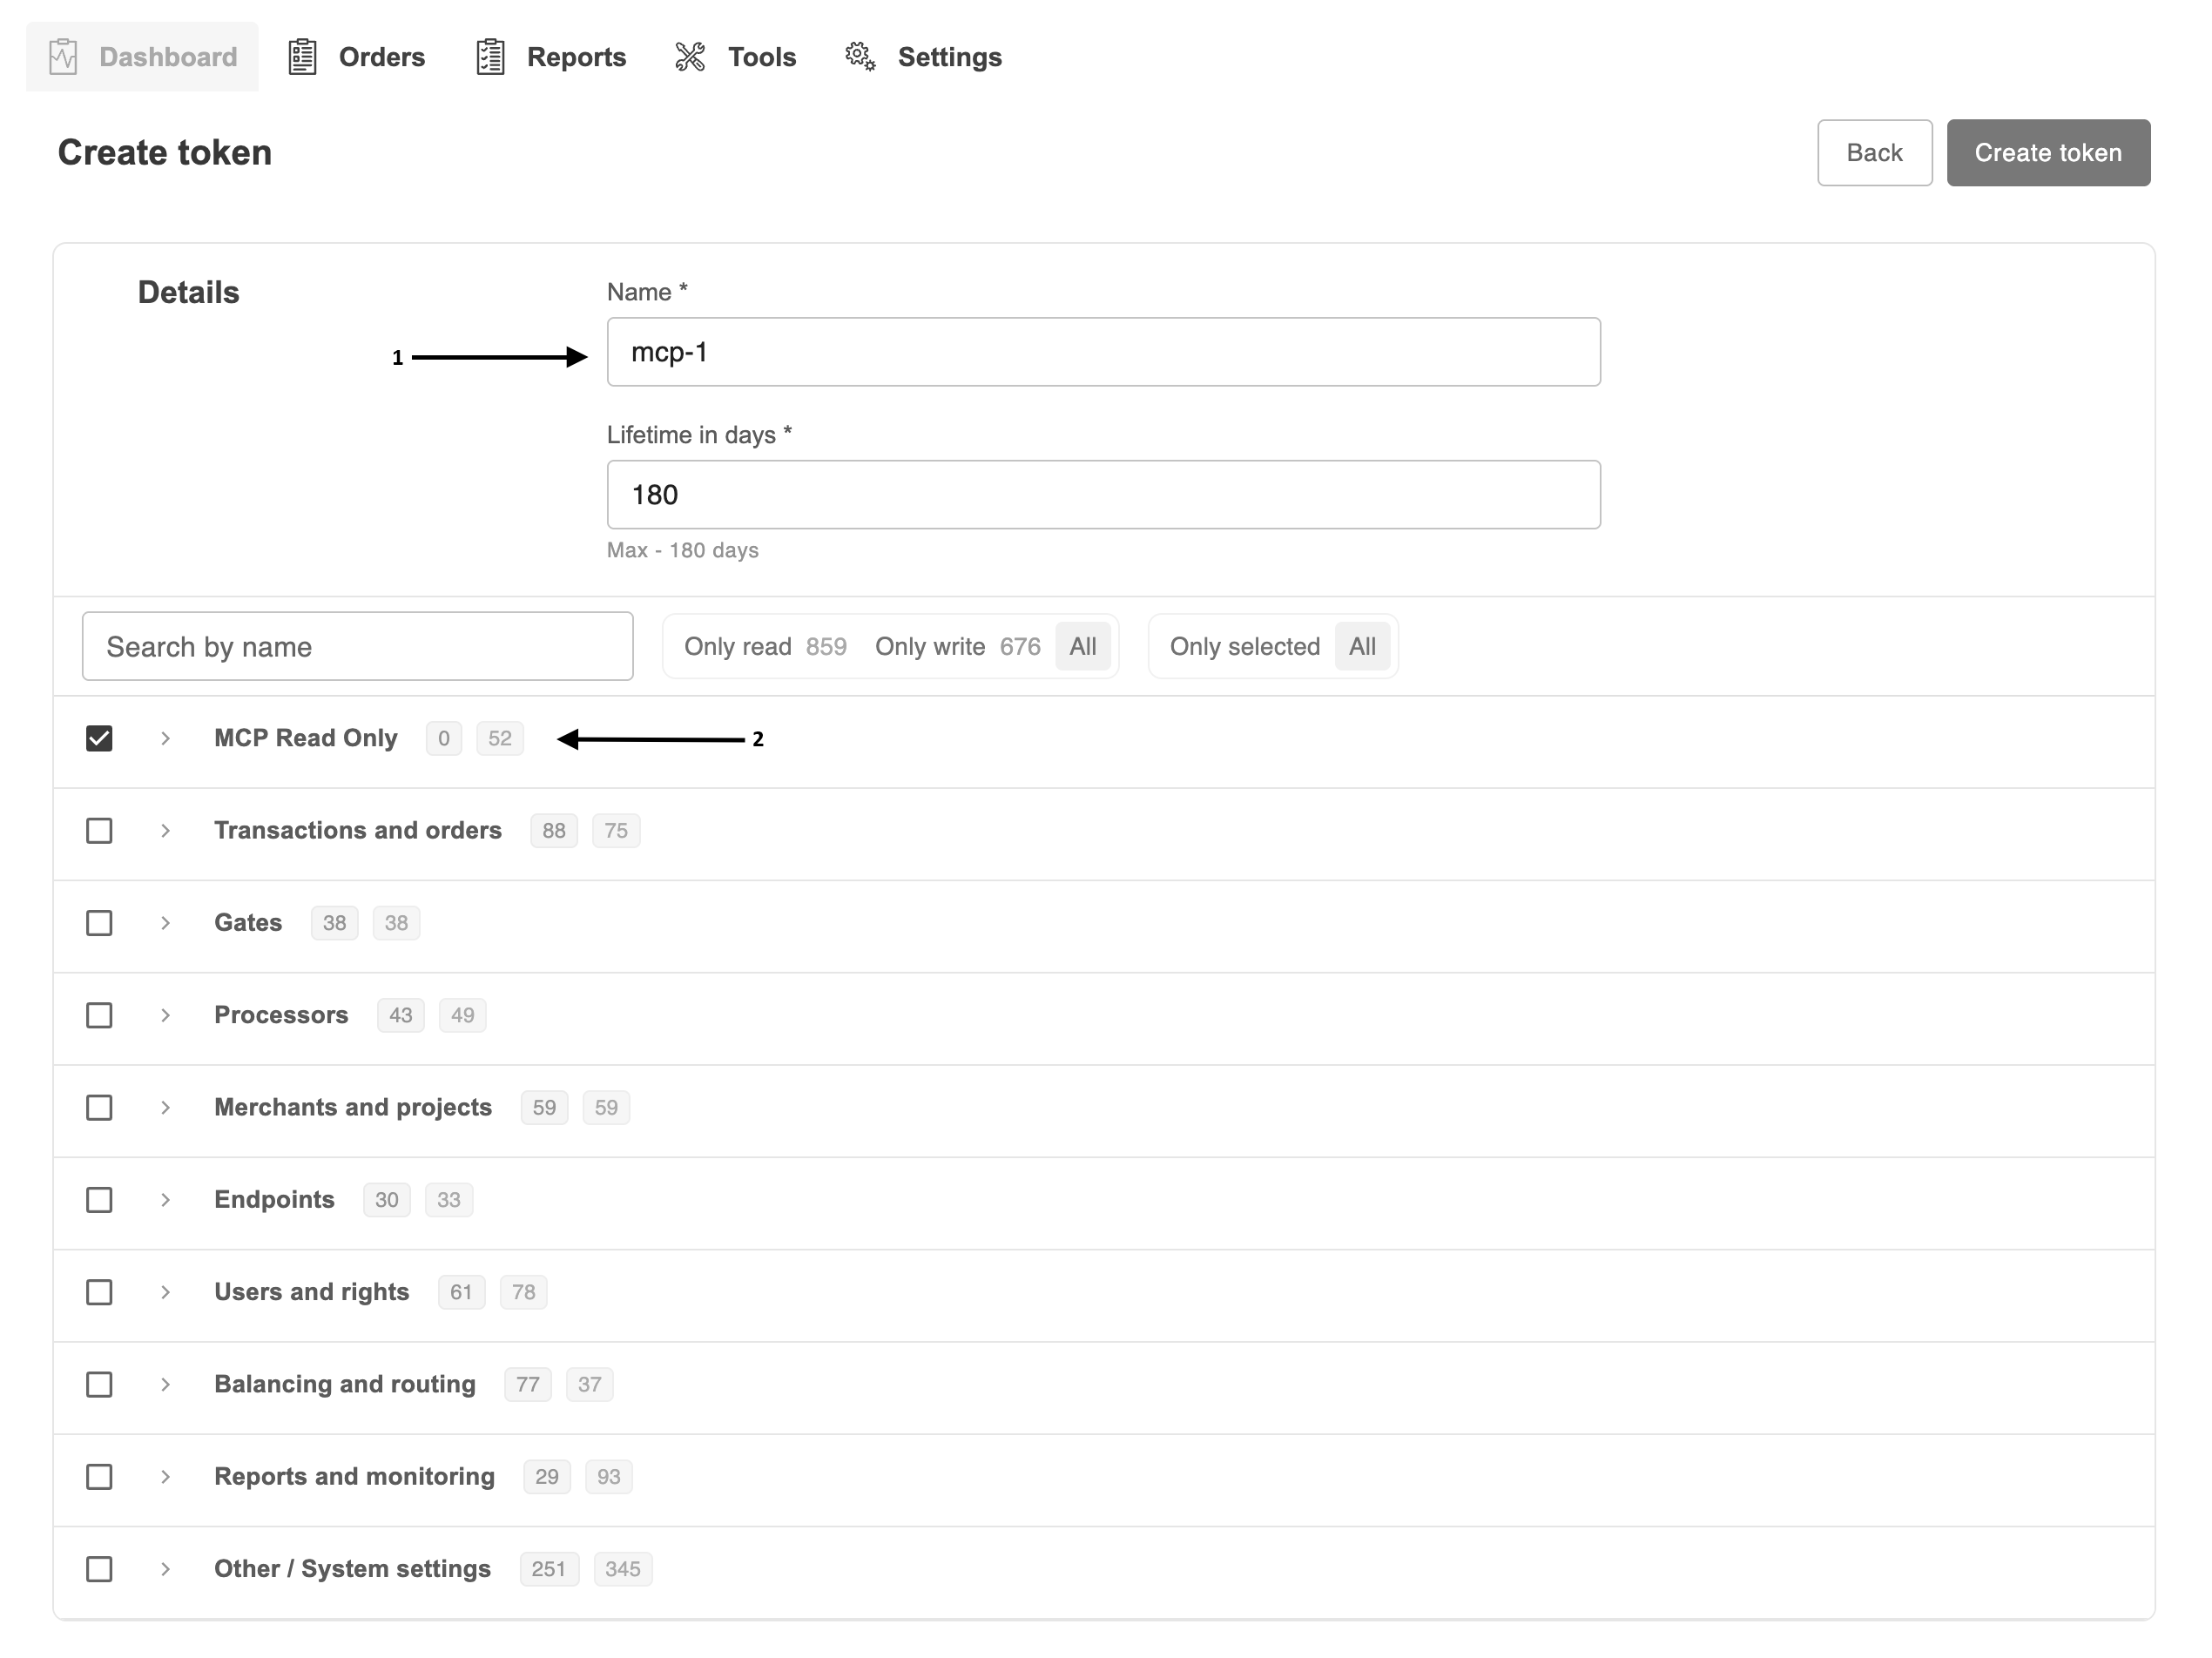
Step 3 — Fill in the token parameters
Field |
Value |
|---|---|
Name |
any token name, e.g. |
Lifetime in days |
up to |
Access rights |
tick the |
Step 4 — Create and copy the token
Click Create token (top-right of the form), then copy the token value and save it.
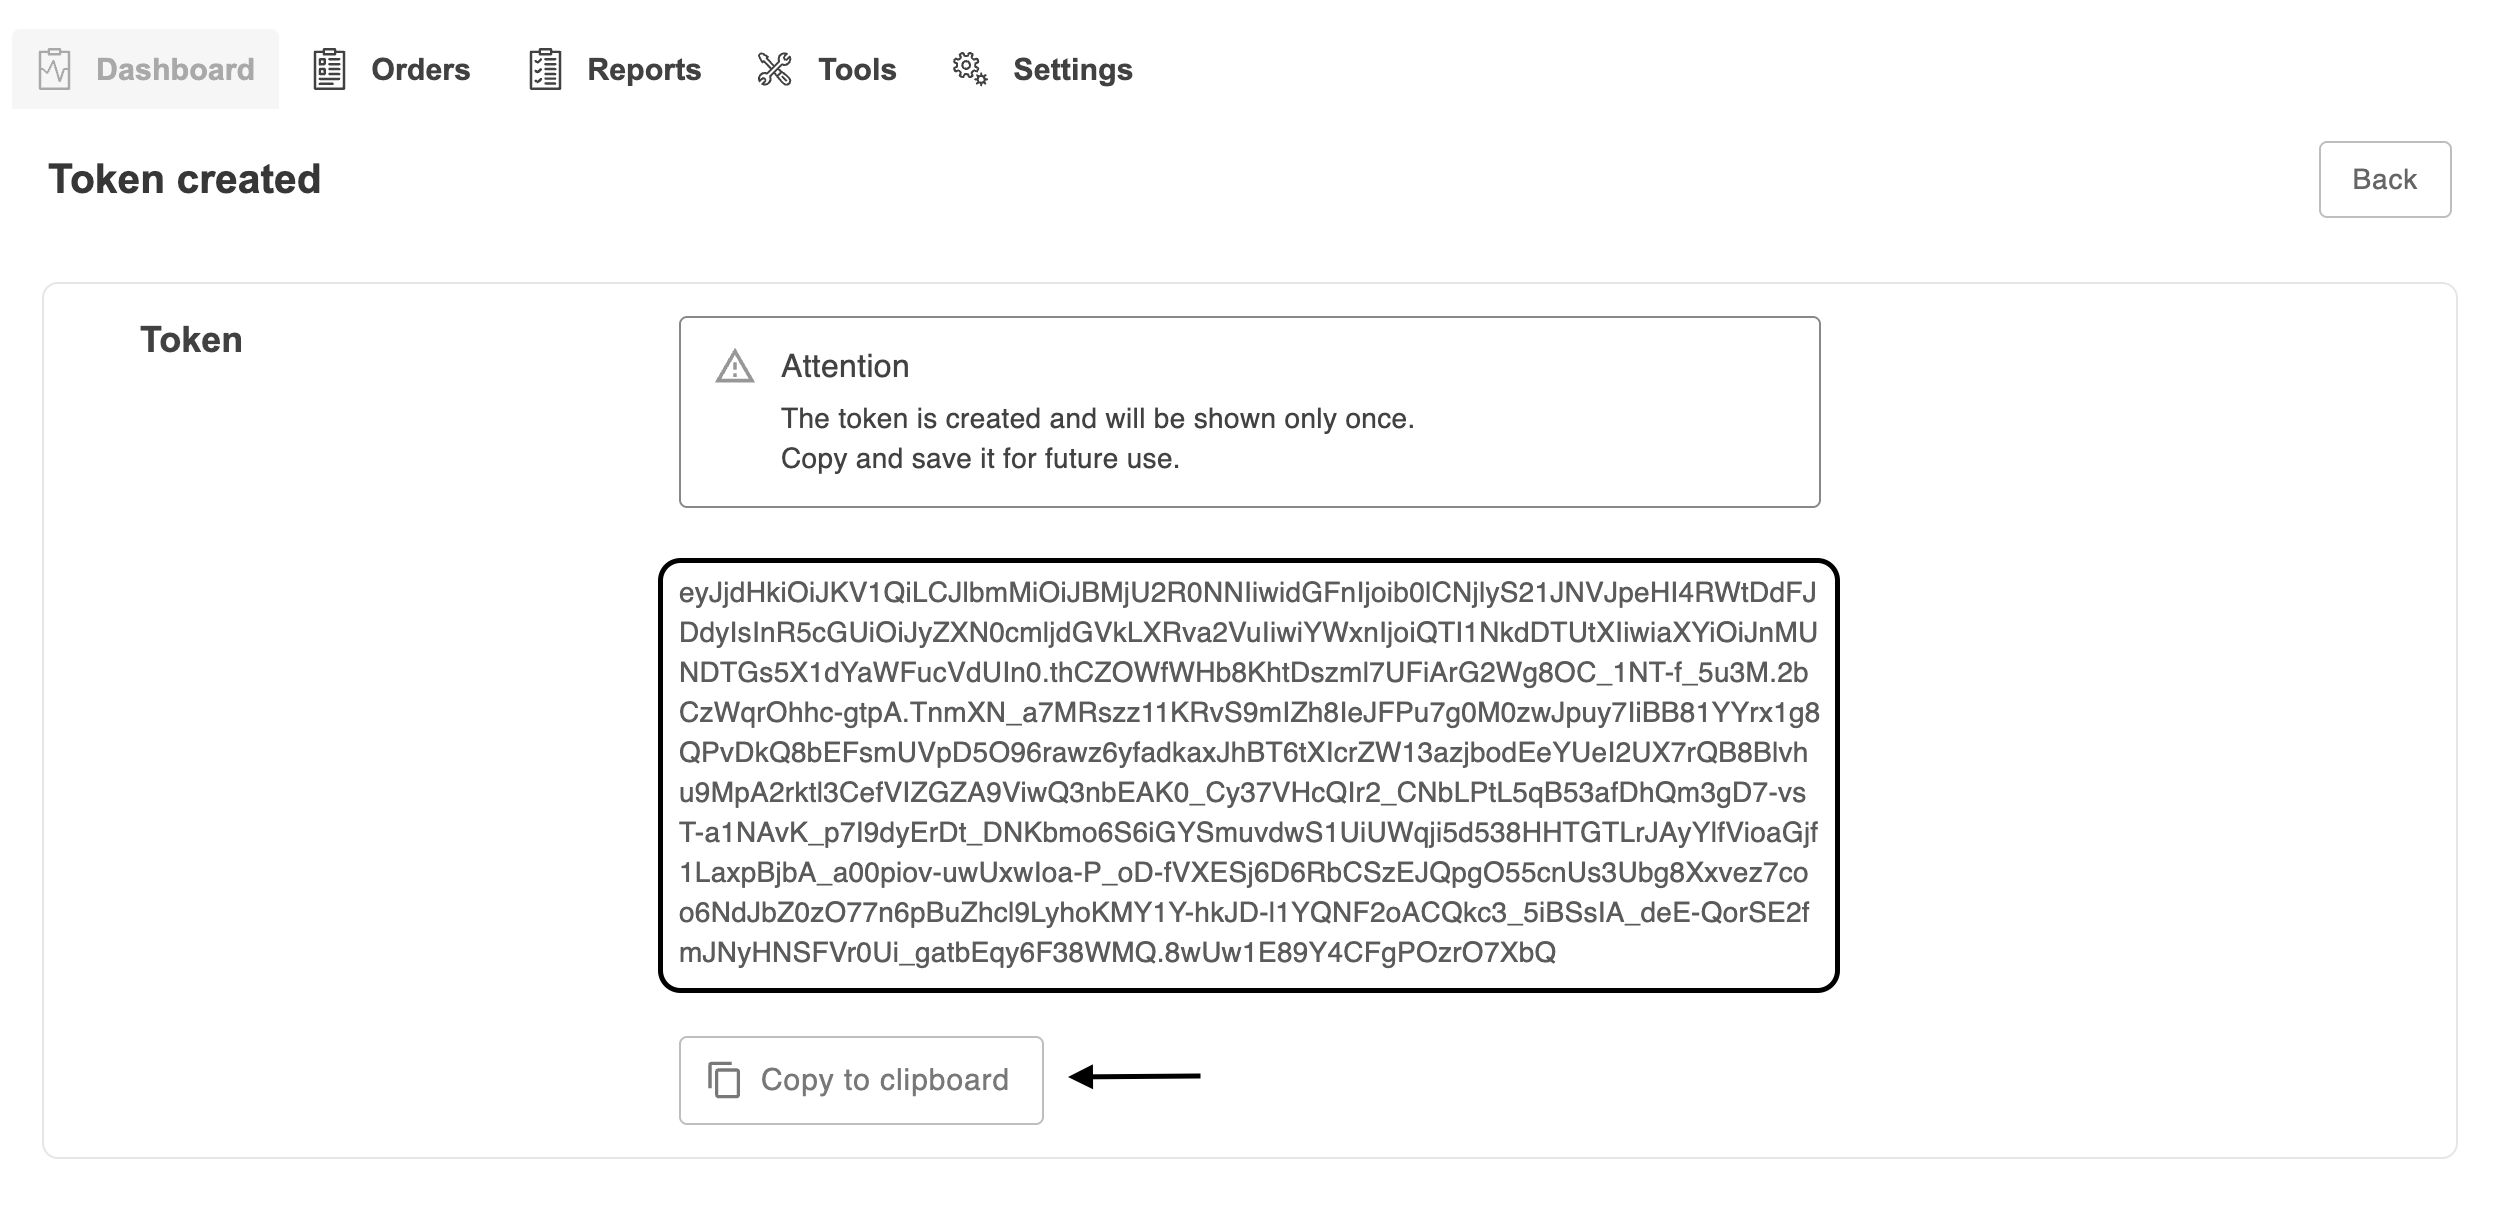
Warning
The token is shown only once. Сlick “Copy to clipboard” and
store it safely. The value cannot be viewed again. It is a long JWT string of
the form eyJ….
Claude Desktop
Claude Desktop connects to remote MCP servers through a configuration file. Since
Doc2.0 server uses an HTTP transport, it is added to the mcpServers section.
Note
In every configuration below, replace <ACCESS_TOKEN> with the value you
copied. The token is sent to the server in the
Authorization: Bearer <ACCESS_TOKEN> header.
File Location
OS |
Path |
|---|---|
macOS |
|
Windows |
|
It can be also opened from the app: Settings → Developer → Edit Config.
Configuration
claude_desktop_config.json
{
  "mcpServers": {
    "Doc2.0": {
      "type": "http",
      "url": "https://gate.doc2.com/mcp-ui",
      "headers": {
        "Authorization": "Bearer <ACCESS_TOKEN>"
      }
    }
  }
}
Note
After saving the file, fully restart Claude Desktop. The connected server appears in the tools menu (the “🔌 / Search and tools” icon).
Alternative: via mcp-remote
If version of Claude Desktop does not support a direct HTTP transport, use
the mcp-remote bridge (Node.js required):
claude_desktop_config.json — mcp-remote
{
  "mcpServers": {
    "Doc2.0": {
      "command": "npx",
      "args": [
        "-y",
        "mcp-remote",
        "https://gate.doc2.com/mcp-ui",
        "--header",
        "Authorization: Bearer <ACCESS_TOKEN>"
      ]
    }
  }
}
Windows: fixing the startup issue
On Windows, launching npx by an absolute path often breaks because of the
space in C:\Program Files\nodejs. The fix is to run it through cmd /c npx
with a bare npx — it is picked up from PATH, so the space no longer breaks
argument parsing:
claude_desktop_config.json — Windows
{
  "mcpServers": {
    "Doc2.0": {
      "command": "cmd",
      "args": [
        "/c",
        "npx",
        "-y",
        "mcp-remote",
        "https://gate.doc2.com/mcp-ui",
        "--header",
        "Authorization: Bearer <ACCESS_TOKEN>"
      ]
    }
  }
}
That is, command = cmd, and npx becomes the first argument after
/c. The resulting command line is cmd /c npx -y mcp-remote …, and the
space in “Program Files” no longer matters.
Note
If it still misbehaves, as a fallback specify the 8.3 short path:
"command": "C:\PROGRA~1\nodejs\npx.cmd". But the cmd /c npx variant is
usually enough.
Claude Code
In Claude Code, MCP servers are added with a single claude mcp add command or
via a .mcp.json file in the project root.
Via the CLI
The fastest way is to add an HTTP server with an authorization header:
Terminal
# transport http, server name Doc2.0
claude mcp add --transport http Doc2.0 \
  https://gate.doc2.com/mcp-ui \
  --header "Authorization: Bearer <ACCESS_TOKEN>"
Visibility is set with the --scope flag:
Scope |
Description |
|---|---|
|
only for you in the current project (default) |
|
in |
|
available across all projects |
Checking the connection
Terminal
claude mcp list           # list servers and their status
claude mcp get Doc2.0 # server details
Inside a Claude Code session, the status is checked with the /mcp command.
Via the project file
To make the server available to the whole team, add a .mcp.json to the
repository root. It’s best not to commit the token — move it to an environment
variable:
.mcp.json
{
  "mcpServers": {
    "Doc2.0": {
      "type": "http",
      "url": "https://gate.doc2.com/mcp-ui",
      "headers": {
        "Authorization": "Bearer ${PAYNET_MCP_TOKEN}"
      }
    }
  }
}
Terminal
export PAYNET_MCP_TOKEN="<ACCESS_TOKEN>"
Note
Claude Code expands ${VAR} from the environment at startup. Commit
.mcp.json to the repository, and keep the token itself in a local .env
/ secret manager.
Other AI agents
The principle is the same for every client: point to the endpoint
https://gate.doc2.com/mcp-ui, use the Streamable HTTP transport, and
the Authorization: Bearer <ACCESS_TOKEN> header. Below are concrete
configurations for popular agents.
Cursor
File: ~/.cursor/mcp.json or .cursor/mcp.json in the project.
.cursor/mcp.json
{
  "mcpServers": {
    "Doc2.0": {
      "url": "https://gate.doc2.com/mcp-ui",
      "headers": {
        "Authorization": "Bearer <ACCESS_TOKEN>"
      }
    }
  }
}
Then: Settings → MCP → Enable for the Doc2.0 server.
VS Code (GitHub Copilot / Agent Mode)
File: .vscode/mcp.json.
.vscode/mcp.json
{
  "servers": {
    "Doc2.0": {
      "type": "http",
      "url": "https://gate.doc2.com/mcp-ui",
      "headers": {
        "Authorization": "Bearer <ACCESS_TOKEN>"
      }
    }
  }
}
Start the server via the Start button above the block in mcp.json or with
the MCP: List Servers command.
Cline · Windsurf · other MCP clients
Most clients use a single format. If a client only supports stdio, wrap the HTTP
server with mcp-remote:
mcp settings (generic)
{
  "mcpServers": {
    "Doc2.0": {
      "command": "npx",
      "args": [
        "-y", "mcp-remote",
        "https://gate.doc2.com/mcp-ui",
        "--header",
        "Authorization: Bearer <ACCESS_TOKEN>"
      ]
    }
  }
}
Manual check (curl)
Before configuring an agent, you can verify that the token works:
Terminal
curl https://gate.doc2.com/mcp-ui \
  -H "Authorization: Bearer <ACCESS_TOKEN>" \
  -H "Content-Type: application/json" \
  -H "Accept: application/json, text/event-stream" \
  -d '{"jsonrpc":"2.0","id":1,"method":"tools/list"}'
The response should contain the list of available tools — that means the server and token are configured correctly.
Parameter summary for any agent
URL —
https://gate.doc2.com/mcp-uiTransport —
Streamable HTTP (stateless)Header —
Authorization: Bearer <ACCESS_TOKEN>Token rights —
MCP Read Only
Domain model
The server ships a domain model in its instructions field so an agent knows
how the entities relate before it calls any tool. The model is reproduced here.
Orders and transactions
An order is a customer purchase attempt. It contains one or more transactions: pre-authorization, capture, refund, chargeback.
Transaction statuses are approved, declined and filtered (filtered = blocked by fraud-prevention rules before processing).
Statistics tools
The stats_* tools return aggregates (counts and amounts) — never
individual orders. Use orders_search to find specific orders.
Scope |
Description |
|---|---|
stats_get_transaction_timeseries |
Returns count + amount per time bucket (day / week / month), split by transaction status. |
stats_get_transaction_summary |
Returns sales / reversals /chargebacks / frauds / disputes (counts + amounts + ratios) for a date range, broken down by card type, with a grand total. |
stats_list_top_entities |
Ranks merchants / companies / processors by a metric over a date range (highest first); reuse the returned ids in the |
stats_get_breakdown |
Splits a metric over a date range (bar chart) by transaction status, card-issuer / IP country, or decline / chargeback / fraud reason. Same filters as the timeseries tool. |
Order tools
Scope |
Description |
|---|---|
orders_get_details |
Returns one order by id: the order/transaction summary, the customer’s card metadata + masked contact, and the merchant routing. Sections appear only for the order APIs the token may call. |
orders_search |
Finds orders by a change-date window with optional status / entity filters and paging; returns safe order summaries. Use |
orders_get_logs |
Returns an order’s processing session stages (the log trail), each stage with its message; |
Resolving ids
Resolve currency / card-type ids via refs_list_*, and
merchant / processor / manager / etc. ids via the *_search tools, before using
them as stats filters.